
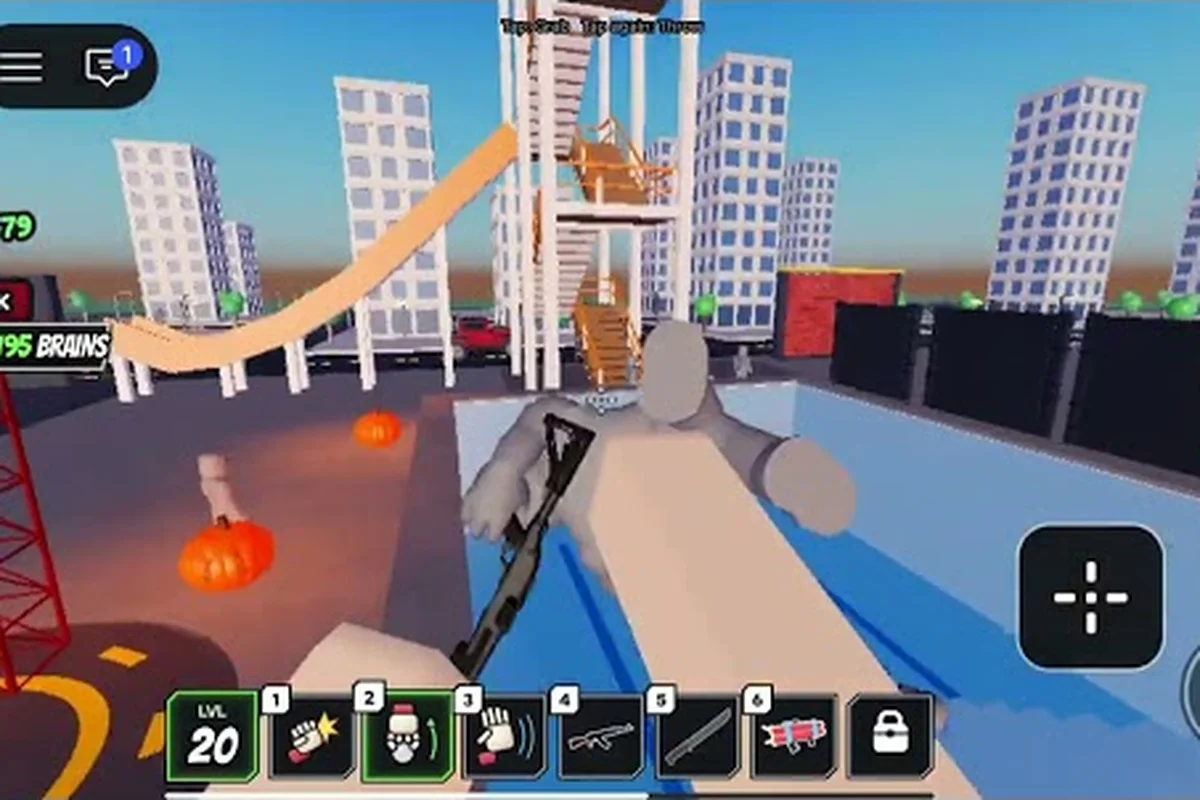
Ragdoll Reality all dummies follow one rule: the exact hit location decides how each target reacts. This guide compares the states you can create, from limping and dismemberment to graveyard conversion, so you can aim for the reaction you actually want to test.
All Dummies and Their Physical Reactions
In Ragdoll Reality, each dummy reacts to the exact point of impact, so aim placement determines the outcome more reliably than the number of hits. A strike to the head, torso, arm, or leg can produce different joint movement and damage reactions, making the Ragdoll Reality dummy types easier to compare by their physical behavior. The Ragdoll Reality dummy guide also includes the graveyard transformation: once a dummy is knocked down and enters the graveyard state, it can return as a zombie, changing the encounter from simple impact testing into a second phase that requires a different target-priority strategy.
Dummy Types and Body Responses
The official Ragdoll Reality game page describes dummies as physical targets that react according to where a hit lands. A leg strike can make a figure limp or crawl, while an arm strike can leave that arm hanging and cause the dummy to clutch the wound. This makes the location-based reaction system the clearest way to separate the available dummy types, even though the game does not publish formal health bars or damage thresholds for each class.
| Dummy type or state | Main physical response | Useful target | Distinctive detail |
|---|---|---|---|
| Standard training dummy | Staggers, recovers, fights back, or runs | Legs for mobility loss | Can get back up after being knocked down |
| Arm-injured dummy | Hangs or shields the affected arm | Arms | May clutch the wounded area |
| Leg-injured dummy | Limps or crawls | Legs | Mobility changes are immediate and visible |
| Dismembered dummy | Loses a limb and reacts through altered movement | Joints and attached limbs | Wounds can bleed after impact |
| Graveyard-converted dummy | Becomes a pursuing zombie | Mobility and control | The conversion depends on the graveyard route |
| Infected dummy | Can spread infection after a bite | Limbs and approach routes | May convert through contact rather than direct damage |
| Slow zombie | Pursues at the lower published speed class | Distance control | One of three stated speed classes |
| Normal zombie | Pursues at the standard speed class | Escape routes | Middle speed category |
| Fast zombie | Pursues at the highest published speed class | Obstacles and open ground | Hardest class to outrun directly |
| Horde dummy | Takes part in a wave-survival encounter | Group spacing and priority targets | A Horde button starts the mode |
This table shows that dummy type is best understood through behavior, not a visible rarity label. The official page identifies three zombie speed classes, while ordinary dummies share broader capabilities such as staggering, recovering, fleeing, and fighting back. Engine-level facts such as mass, gravity, joint limits, and exact numerical damage are not published, so claims about precise health values or force thresholds would be guesswork.
Standard training dummies
A standard dummy is the baseline target for learning Ragdoll Reality combat. It can stagger after a strong impact, resume movement when the hit is not decisive, run away, and eventually rise after falling. Because the target reacts locally, the most informative test is to compare a clean torso hit with a leg strike rather than assuming every attack produces the same result.
Community experience also suggests that dummies may fight back once they recover, which means experimentation should account for the target’s state after each collision. If a dummy begins moving, retreating, or changing direction, its behavior has changed even when no conventional health meter appears on screen.
Injured and dismembered dummies
Arm and leg injuries create visible state changes instead of simply shortening a bar. An injured arm can hang while the figure holds the wound, and a leg injury can shift the body into a limp or crawl. The impact-point response is important because aiming at the torso teaches less about the system than striking a specific limb.
Once a limb detaches, the body continues to move with a different physical profile. The official description treats each body part as a separate target, so a detached arm or leg can be handled independently from the torso. For more focused dismemberment practice, the Ragdoll Reality limb-removal techniques guide explains how joints and attached parts affect the result.
How Dummy Types Differ in Behavior
Ragdoll Reality dummy behavior is driven by physical consequences instead of a simple enemy-turn system. A hit at the exact impact point can produce a stagger, wound, or limb loss, and the dummy may then limp, crawl, clutch an injury, flee, or return to its feet. The official Ragdoll Reality page confirms the location-based reaction model but does not publish exact damage values, dismemberment thresholds, or a universal health formula.
| Result | What the player sees | Likely practical cause | Tactical meaning |
|---|---|---|---|
| Stagger | The dummy loses balance and recovers | Force or impact placement | Opens a short follow-up window |
| Limp | One leg moves poorly | Leg injury | Reduces travel speed |
| Crawl | The body advances low to the ground | Severe leg disruption | Limits escape options |
| Arm hanging | The arm no longer moves normally | Arm injury | Weakens reaching and grabbing |
| Wound clutching | The dummy holds the damaged area | Pain response | Confirms a localized injury |
| Bleeding | Blood appears around the wound | Detached or damaged tissue | Indicates a serious physical result |
| Limb detachment | A body part separates | Joint destruction | Alters movement and grab options |
| Get up | The dummy rises after falling | Recovery behavior | A knockdown is not always final |
| Fight back | The target attacks after recovering | Active dummy state | Requires spacing and another plan |
| Run away | The dummy retreats | Self-preservation behavior | Creates chase opportunities |
These outcomes explain why damage is localized rather than uniform. Two strikes can produce dramatically different scenes if one lands in the torso and the other disrupts a leg. A body might remain mobile despite visible blood, or it may lose the ability to stand even without a conventional knockout display. The best test is therefore visual and repeatable: strike a zone, observe the response, and avoid treating an animation as proof of a hidden stat threshold.
How damage registers
The safest explanation is also the most accurate one: damage follows the impact point. The game presents the body as a set of physical regions, and injuries affect how the dummy moves. A leg hit changes locomotion, an arm hit changes the upper body, and a severe enough joint injury can remove the limb. This is different from a traditional system where every strike subtracts an identical value from a number.
The practical test sequence is simple: because each body zone has its own physical response, repeat the same strike under controlled conditions and compare the resulting ragdoll behavior. For example, an arm impact that produces a loose swing can be distinguished from a torso hit that primarily redirects the whole body, while a leg injury may cause a fall that leads to crawling rather than an immediate recovery. Avoid using a single “damaged” or “undamaged” label; track the affected region and the specific movement change instead.
-
Strike an arm and note whether it hangs, swings loosely, or prompts the dummy to clutch it.
-
Strike a leg and compare the response with a torso impact.
-
Observe whether the dummy can stand, crawl, retreat, or rise again.
-
Test whether grabbing or throwing changes the trajectory enough to cause another impact.
-
Record the result by zone instead of labeling every target as simply damaged or undamaged.
This approach is more useful than searching for an exact damage formula because no official health values are available. The dummy stumble and target-zone breakdown provides a focused companion for testing leg, arm, torso, head, and joint outcomes without assuming unsupported numbers.
Why hits can look stronger than expected
Impact speed, body position, and the part of the dummy that receives a hit all influence the resulting animation. A moving target may absorb a collision differently from a stationary one, while a thrown dummy can strike the ground after a short flight. Because these variables are not represented by published engine specifications, the result should be described by what happens rather than assigned an invented force multiplier.
A good community test keeps the tool, target stance, and approach angle stable. Change only the body zone, then compare the result. This isolates the location-based response and makes it easier to learn which target produces a stumble, a crawl, or a more persistent injury. Repetition also reveals whether a particular result was temporary recovery behavior or a lasting change.
Body-Zone Reactions Across Dummy Variants
Ragdoll Reality dummy reactions become easier to learn when every strike is treated as a target-zone test. The torso is the central zone, the limbs control mobility and manipulation, and the head and neck can alter posture. Each region also interacts with physics, so the clearest reaction depends on both the hit and what the body was doing immediately beforehand.
| Target zone | Expected reaction | Movement after impact | Practical priority |
|---|---|---|---|
| Head | Strong head movement or loss of balance | Uncertain and situational | Useful for interrupting balance |
| Torso | Stagger or knockback | Often temporary unless compounded | Good for general knockdowns |
| Left arm | Arm may hang or be clutched | One-sided reduction in handling | Strong for preventing grabs |
| Right arm | Arm may hang or be clutched | One-sided reduction in handling | Strong for preventing grabs |
| Left leg | Limp or crawl | Reduced standing ability | High mobility value |
| Right leg | Limp or crawl | Reduced standing ability | High mobility value |
| Joint | Possible separation of an attached limb | Altered body structure | Best for lasting dismemberment |
| Thrown body | Additional impact after landing | Depends on collision and posture | Useful for chained damage |
The body-zone hierarchy is not a guaranteed damage ladder. A head strike may produce a dramatic reaction without guaranteeing a knockdown, while a leg strike can be more useful because it changes where the dummy can go. The table therefore ranks practical control opportunities rather than declaring guaranteed outcomes.
Leg targeting for control
Leg targeting offers the most obvious mobility change. The official page specifically describes a leg hit as capable of leaving a dummy limping or crawling, so it deserves priority when the goal is to keep the target from reaching a dangerous area. A crawling dummy cannot use its normal movement in the same way, which may provide enough time to reposition the player, create distance, or set up another impact.
The result can still depend on recovery. A target that falls may rise, and a temporary stumble can become a lasting limitation only if the leg condition persists. For a broader look at sequencing attacks, the Ragdoll Reality knockout guide covers how limb injuries can be used to limit movement before another hit.
Arm targeting for control
An injured arm can hang while the dummy clutches the wound. That visible response makes arms useful when the objective is to interfere with reaching, grabbing, or holding another object. It also creates a clean test for the location system because the result stays attached to the selected limb instead of affecting the whole body uniformly.
Players often interpret a clutch animation as a temporary stun. It is safer to treat it as a local impairment until the body proves otherwise. The dummy may still move, turn, or fight back, so follow-up positioning should account for its remaining limbs and its current direction of travel.
Joint targeting for lasting changes
Joints are the most relevant locations for dismemberment because the official game page confirms that limbs can detach. Attaching force at a joint may produce a more durable structural change than striking the middle of a limb, although exact thresholds are not published. Players should therefore use visible separation as the confirmation rather than expecting a numeric prompt.
A detached body part does not necessarily make the entire dummy inert. The torso can continue acting with fewer limbs, and the remaining body may still move differently than it did before. This makes dismemberment useful for a specific purpose, such as reducing reach or changing balance, rather than a universal answer for every encounter.
Graveyard, Zombie, and Horde Dummy Types
The graveyard adds a separate dummy state to the roster. According to the official game page, throwing a dummy into the graveyard converts it into a zombie. The same source identifies three speed classes—slow, normal, and fast—and describes the transformed enemies as capable of pursuing, pouncing, and biting. A bitten dummy can become infected and pass on the condition, creating a conversion route that differs from direct limb damage.
| Graveyard or zombie type | Trigger or identifier | Core behavior | Best response |
|---|---|---|---|
| Converted dummy | Thrown into the graveyard | Becomes a pursuing zombie | Control the approach route |
| Infected dummy | Bitten by a zombie | Can spread infection | Separate it from other dummies |
| Slow zombie | Lowest stated speed class | Pursues slowly | Easier to outpace in open space |
| Normal zombie | Standard stated speed class | Pursues at a middle speed | Use corners and obstacles |
| Fast zombie | Highest stated speed class | Pursues rapidly | Avoid straight-line escapes |
| Pouncing zombie | Uses pounce behavior | Closes distance in a sudden motion | Watch for the wind-up |
| Biting zombie | Uses a bite attack | Can infect a dummy | Interrupt its range |
| Horde dummy | Appears in wave-survival mode | Participates in a grouped wave | Prioritize threats and spacing |
This conversion path means that the graveyard outcome belongs in any complete dummy guide. Damage can disable a body, but the graveyard can change its category entirely. Because zombie health, bite damage, wave size, and exact conversion conditions are not published, the safest strategy is based on spacing, interruption, and avoiding isolated targets.
Converting a dummy safely
A controlled throw into the graveyard is the most direct route to a zombie, but it also creates a new threat that may pursue other characters or dummies. The conversion is therefore not automatically beneficial. Players should use it when the resulting zombie can be isolated, redirected, or handled in a way that reduces pressure elsewhere.
A practical sequence begins with weakening the dummy enough to make its trajectory manageable. Pull it away from valuable objects, choose a clear route toward the graveyard, and avoid throwing it across an area where the new zombie can immediately reach an objective. Once converted, the important variables become speed class, distance, and whether the zombie can bite another dummy before the player intervenes.
Handling slow, normal, and fast zombies
The three published speed classes provide a useful framework without pretending that exact stats exist. Slow zombies create the least pressure in open areas, normal zombies punish poor route planning, and fast zombies remove the safety of a straight retreat. A player can therefore respond to the class rather than searching for an unlisted numerical advantage.
| Situation | Slow zombie | Normal zombie | Fast zombie |
|---|---|---|---|
| Open ground | Maintain moderate distance | Preserve a route around obstacles | Change direction immediately |
| Narrow corridor | Block the entrance | Time the advance | Avoid standing directly ahead |
| Objective defense | Let it approach within control range | Interrupt at medium range | Prioritize it over slower targets |
| Group fight | Hold as a background threat | Separate from fast units | Create space first |
| Infection risk | Limit contact with other dummies | Keep bite range clear | Prevent it from reaching a cluster |
Because speed class is the only confirmed numerical distinction in Ragdoll Reality: All Dummies, players should treat claims about exact movement speed, health, or damage as unverified rather than using them to calculate encounters. The table’s practical differences come from observed dummy behavior: for example, a normal zombie in an objective-defense fight can be interrupted at medium range, while a fast zombie requires immediate direction changes and space creation. Reading approach pattern, bite-range distance, and ragdoll reactions gives a reliable basis for choosing an attack, reposition, or retreat without inventing hidden stats.
The Horde mode
The Horde button starts a wave-survival scenario, changing the dummy guide from a target-practice topic into a defensive test. A horde is likely to be less forgiving of repeated mistakes because the player must protect space while multiple bodies act at once. Fast enemies deserve immediate attention, but ignoring slow or normal zombies can allow the group to become surrounded.
Useful priorities include protecting the player’s position, separating infected dummies from healthy ones, and using obstacles to interrupt pursuit. The Ragdoll Reality getting-started guide can help with the basic controls and objectives before the player experiments with conversion and wave play.
Practical Dummy Guide for Every Encounter
A reliable Ragdoll Reality dummy guide starts with observation rather than a fixed combo. The official game page supports the mechanics of staggering, recovering, bleeding, dismemberment, fleeing, and fighting back, but it does not provide exact health values or damage thresholds. Use the body’s visible response to determine the next action.
| Goal | First target | Follow-up objective | Why it works |
|---|---|---|---|
| Stop a fleeing dummy | Leg | Maintain distance | A leg injury can produce a limp or crawl |
| Prevent a grab | Arm | Keep the target off balance | An injured arm may hang or be clutched |
| Cause a knockdown | Torso | Follow before recovery | The torso produces a broad stagger response |
| Dismember | Joint | Track the separated limb | Joints connect attached body parts |
| Create a zombie | Thrown body | Control the new route | The graveyard triggers conversion |
| Stop infection | Biting zombie | Separate it from the group | Bites can infect other dummies |
| Survive the Horde | Fast zombie first | Manage slower targets | Fast units close distance fastest |
This decision table converts the confirmed mechanics into practical goals without inventing hidden statistics. The best target depends on what the dummy is doing, where the player needs it to stop, and whether the player is willing to create a new enemy in the graveyard.
Damage Test Across Dummy Types
A controlled test reveals more than random fighting. Keep the same tool, begin with a standing dummy, and target one zone at a time. Record the immediate reaction, the movement state after a few seconds, and whether the dummy recovers. Then repeat with a different limb or the torso.
For torso hits, check for a temporary stagger and recovery. For arm hits, look for a hanging limb or clutching behavior. For legs, note whether the target merely slows, limps, or crawls. This creates a practical record of Ragdoll Reality how to damage dummies without relying on a nonexistent health table.
Knockdown Test Across Dummy Types
Knockdown testing should separate balance damage from mobility damage. A torso impact can create a general fall, while a leg strike can make the target stay down or move in a compromised way. After the fall, wait for recovery instead of immediately attacking, because a dummy can get back up and may fight back after regaining balance.
The distinction matters when a player wants a temporary interruption versus a long control window. A dramatic topple may be less useful if the dummy recovers immediately, while a leg injury can continue to affect travel even after the initial animation ends. The stumble target-zone breakdown is useful for recording which impacts create persistent limitations.
When to run, block, or continue attacking
Running is sensible when the dummy has recovered, is moving faster than the player, or is guarding the route to a dangerous area. Blocking can buy space, but it should not replace targeting the body zone that creates the needed response. Continuing an attack makes the most sense when a limb is already impaired, a wound is visible, or a knockback could send the body into another obstacle.
Avoid committing to repeated strikes without checking the state. A dummy that has begun to rise may interrupt the sequence, and one that turns to fight back can punish a fixed rhythm. The player’s tool, stance, and available space also matter, so the most efficient target is the one that creates the desired result with the least exposure.
Comparison Errors to Avoid
The largest mistake is treating every dummy as identical. Another is assuming that a visible fall equals permanent defeat. Ragdoll Reality dummies can recover, rise, run, and fight back, so a knockdown should be treated as a temporary state unless the body shows a lasting impairment. Players also tend to overfocus on the torso even when an arm or leg would produce a more useful limitation.
Another error is throwing a dummy into the graveyard without planning the consequence. Conversion creates a zombie with pursuing, pouncing, and biting behavior, and a bitten dummy can spread infection. Treat the graveyard as both a transformation point and a risk, not as a free defeat button.
Frequently Asked Questions
Are there different dummy types in Ragdoll Reality?
Ragdoll Reality does not present ordinary dummies as a catalog of named classes with published health values. Instead, their types are distinguished by condition and behavior, including arm injuries, leg injuries, dismemberment, infection, and graveyard conversion. The game officially identifies slow, normal, and fast zombie classes, so these are the clearest formal categories.
What happens when you hit a dummy in the legs?
A leg hit can leave the dummy limping or crawling, as confirmed by the official game page. This response is valuable because it reduces mobility rather than merely causing a short stun. The lasting effect can vary, so players should observe whether the dummy continues to crawl, attempts to stand, or eventually recovers normal movement.
Can Ragdoll Reality dummies get back up?
Yes. The official description confirms that dummies can get back up after falling, and they may also stagger, flee, recover, and fight back. A knockdown therefore creates an opening rather than guaranteeing permanent defeat. Continue targeting an impaired limb or a vulnerable body zone if the player needs a longer control window.
What is the best way to kill a dummy in Ragdoll Reality?
The most effective method depends on the objective and the target’s state. Leg targeting can impair movement, arm targeting can interfere with reaching, and joint targeting can cause a limb to detach, but no exact damage or knockout formula is published. Test the body zone, watch the visible reaction, and continue only when the target cannot quickly recover or counterattack.
Does throwing a dummy into the graveyard always work?
A dummy thrown into the graveyard can convert into a zombie, according to the official game page. The new zombie can pursue, pounce, and bite, while a bitten dummy can become infected. Because the conversion creates a mobile threat, players should control the throwing direction and ensure the transformed enemy cannot immediately overwhelm an objective or another vulnerable target.