
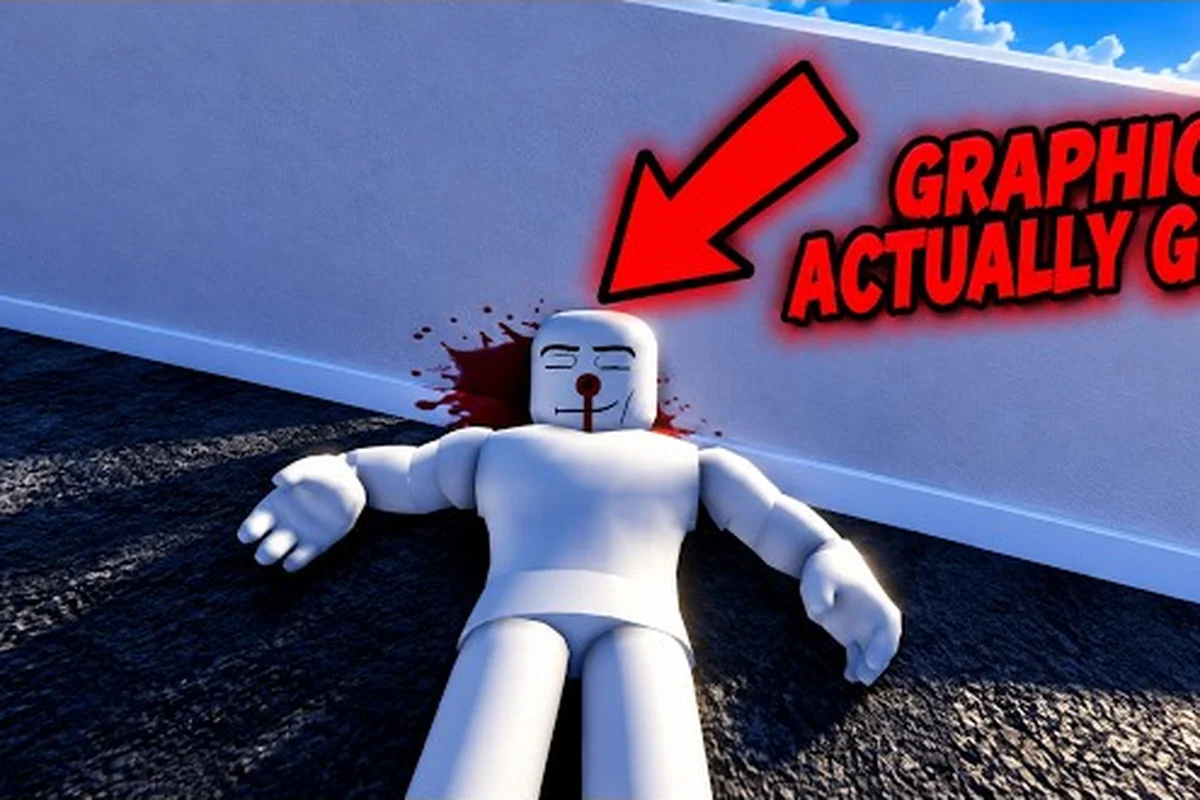
Ragdoll reality beginner mistakes often turn a promising first session into random flailing, especially when players change throw speed, body positioning, and target selection at the same time. Start with one variable per test: for example, keep the same face and release point, then alter only the throw power and note whether the dummy’s head, torso, or limbs absorb the impact. Watching the ragdoll’s reaction after contact reveals whether the setup produced balance, momentum transfer, or an accidental stumble. This slow, controlled comparison is the best way to play Ragdoll Reality for beginners because it exposes weak timing and positioning before a full-speed attempt makes the cause unclear.
What Separates a Useful Session From Random Testing
Ragdoll Reality is a physics sandbox where the location of a hit matters as much as the weapon used. The official Ragdoll Reality game page describes dummies that can stagger, fight back, run away, recover, lose limbs, and bleed. That means a successful test is not simply a dummy falling over; it is a clear result that shows where the impact landed and how the body responded.
Many ragdoll reality beginner mistakes begin with changing weapons, targets, and locations at the same time. If a melee swing knocks a dummy sideways, you cannot determine whether the result came from the weapon, the target area, your timing, or the environment. A controlled test changes only one factor and records what happens next.
The strongest approach is to build a simple loop: define the result you want, change only one variable, and record the dummy’s response before making the next adjustment. For example, if a leg hit produces a sideways fall while an arm hit causes the dummy to recover, keep the same weapon and strike location while varying the timing. This isolates the impact area as the likely cause and helps you distinguish a repeatable ragdoll reaction from a one-off result. Once the basic behavior is clear, you can test moving targets, obstacles, and multiple dummies without confusing several changes at once.
-
Select a stationary dummy as the first target.
-
Choose one weapon and one target area.
-
Deliver the hit with a deliberate action.
-
Observe the immediate reaction and the dummy's next movement.
-
Repeat the test with a small adjustment.
This method turns experimentation into a repeatable system by keeping the weapon, impact zone, distance, and timing visible in each trial, then recording whether the dummy staggers, recovers, loses limb mobility, or enters a full ragdoll. For example, if a leg strike consistently produces a sideways collapse, preserve that setup and adjust only the strike timing before testing a moving dummy. This baseline makes later hazards, moving targets, or multiple enemies easier to evaluate because you can identify which added factor changed the outcome instead of mistaking an accidental one-off reaction for a reliable mechanic.
A Simple Session Structure
A good first session can be divided into three short blocks. You do not need to complete them in one sitting because the essential first-session steps can also be used as a repeatable checklist.
| Session block | Main objective | What to observe | Mistake to avoid |
|---|---|---|---|
| Calibration | Learn basic controls and body reactions | Grip, swing, aiming, recoil | Changing equipment after every hit |
| Target study | Test torso, arms, and legs | Limpness, balance, recovery | Assuming every body area behaves alike |
| Scenario test | Add movement or a hazard | Staggering, pursuit, knockback | Adding several variables at once |
| Challenge test | Try the graveyard or Horde mode | Conversion, zombie speed, survival | Entering before testing a weapon |
The best way to play is to make each block produce one clear lesson. If the question is whether a pistol can interrupt a standing dummy, keep the test stationary. If the question is how the same pistol behaves while the target runs, repeat the shot under that new condition.
Beginner Mistakes: Target and Timing Errors
Targeting is the foundation of the sandbox, but many new players treat the dummy as a single damage box. The official page explains that a leg injury can make the dummy limp or crawl, while an arm injury can leave that arm hanging and cause the dummy to clutch the wound. The same location-based system means your aim matters even when the weapon is powerful enough to knock the dummy down.
A torso hit may produce a more general stagger, while a limb hit creates a localized problem the body must compensate for. This does not mean every arm strike is better than every chest strike. It means a good test isolates the result so that you can compare outcomes instead of assuming every knockdown is identical.
Match the Hit to the Question
Before striking, decide what you are trying to learn. A broad test and a precision test produce different evidence, and using a pistol when the real goal is to study a machete swing will add noise rather than insight. For example, to test balance disruption, compare one controlled machete swing with a stationary dummy against a sequence of pistol shots at a moving target; the first reveals the blade’s impulse and the dummy’s recovery, while the second mainly measures crosshair tracking and shot timing. For a reliable beginner comparison, keep distance, target area, and swing path constant, then record whether the result comes from the weapon’s impact or from unrelated movement.
| Intended test | Better setup | Useful observation | Less useful test |
|---|---|---|---|
| Learn aiming | Stationary dummy, controlled distance | Whether the shot reaches the intended area | Firing during a chase |
| Test a blade | Clear swing arc near one limb | Balance change after contact | Spamming at several dummies |
| Compare power | Same target area and distance | Stagger, displacement, recovery | Comparing torso and leg hits |
| Test interruption | Moving dummy, one timed hit | Whether action stops before impact | Multiple attacks at once |
| Examine hazards | Repeated entry from the same position | Consistent push or collision response | Changing location every attempt |
For close-range timing, the practical machete guide explains how to treat the swing as a controlled strike rather than a button press. The same principle applies to firearms: a shot released while the camera is moving may reveal more about your crosshair placement than about the weapon itself.
Interpret the Physical Response
A hit can land perfectly and still produce a misleading conclusion. Physics objects may continue moving after impact, and a dummy that falls may recover. Record the moment of contact, the first body response, and the later recovery. This three-part observation gives you much more information than a single end-state screenshot.
| Observation window | What to record | Why it matters |
|---|---|---|
| Impact | Contact location and immediate motion | Confirms the intended hit registered |
| One second later | Limb position, balance, and stagger | Shows the first physical consequence |
| Three seconds later | Recovery, retreat, or continued fall | Separates temporary stagger from lasting effect |
| After the dummy rises | Movement speed and visible injury | Shows how the altered body changes behavior |
This observation process is central to a practical Ragdoll Reality strategy guide. It also improves the way you handle weapons with different speed, reach, and impact styles. Instead of asking whether one tool is always strongest, you can ask which tool reliably creates the result your scenario requires.
Weapon Testing Mistakes That Obscure Useful Results
Weapon choice attracts a lot of attention in Ragdoll Reality, but switching immediately after an unexpected result is one of the most common beginner errors. A single test cannot separate weapon performance from player timing, camera angle, target distance, and body placement. A responsible comparison repeats the same conditions with only the tool changing.
Players often enter with a favorite weapon and then try to force every scenario into that item. This is understandable, but it hides useful information. The complete weapon overview can help you group tools by practical role, while a controlled test determines which one fits your current objective.
Build a Fair Comparison
Use a dummy, clear area, and repeatable distance. Fire or swing at the same body region, wait for the dummy to settle, and then change one variable. If the goal is to compare stopping power, do not compare a leg strike from a blade with a torso shot from a firearm.
| Test variable | Keep constant | Change | Record |
|---|---|---|---|
| Weapon impact | Same target area and distance | Tool | Displacement, stagger, recovery |
| Target location | Same weapon and distance | Body area | Balance change and mobility |
| Movement | Same weapon and hit location | Dummy motion | Accuracy and tracking difficulty |
| Recovery time | Same weapon and location | Time between hits | When the dummy regains control |
| Environment | Same weapon and target area | Position near hazard | Collision or hazard effect |
The Ragdoll Reality how to get better process is to ask one question, choose the cleanest test, and resist changing the setup until you have an answer. Once you understand the result, add one new variable. That sequence makes it much easier to learn whether an impressive moment came from precise aim, strong force, a lucky angle, or the physics environment.
Account for Weapon Characteristics
Ranged and melee tools create different testing conditions. A firearm may reward distance and line of sight, while a melee weapon depends on timing and the space around the target. The Ragdoll Reality pistol guide provides a focused example of why range and control should be evaluated separately from raw impact.
Test each weapon in a controlled scenario before comparing it, because a useful result must separate impact power from handling, trigger response, and recovery time. For a pistol, fire several controlled shots at the same distance and target, then note whether recoil, reload time, or inaccurate aim changes the outcome. For a melee tool, repeat the same strike from identical positioning, since timing, reach, and the surrounding space determine whether the hit connects cleanly. This creates a repeatable baseline that exposes beginner mistakes more clearly than relying on a single dramatic ragdoll reaction.
-
Changing the target during the comparison. A moving dummy adds tracking and timing to the results.
-
Firing while reloading or recovering. The test should measure the weapon action, not the penalty for missing the ideal window.
-
Treating a dramatic fall as the only success. A limb injury may be more useful for a survival scenario than a full knockdown.
-
Ignoring camera direction. A strike that looks accurate on screen may land elsewhere if the camera is angled away from the body.
-
Judging by feel alone. Repeat the action several times so one unusual bounce does not define the tool.
Movement, Environment, and Survival Missteps
A stationary dummy is useful, but it cannot teach you everything. Ragdoll Reality includes playground hazards and an 80-stud tower according to the official game page, so improving means testing how the body interacts with the world as well as with weapons. The most common ragdoll reality beginner mistakes involve using dangerous spaces before establishing basic control.
A hazard can change an otherwise ordinary result. A shove near a ledge may become a fall, a shot that staggers a walking dummy may interrupt its route, and a collision may send both bodies into a different state. If your goal is to measure the weapon, remove the hazard. If your goal is to measure survival, introduce it deliberately and record the conditions.
Choose Tests That Serve a Goal
Use the environment in one of two distinct ways: keep it controlled for calibration, or make it the central obstacle for a survival test. For example, a stationary dummy on flat ground isolates impact and knockback distance, while a moving target in the same space tests pursuit and positional control. Changing both the target and the terrain at once makes it difficult to identify whether the result came from momentum, weapon timing, or a hazard interaction.
| Objective | Target setup | Environment role | Useful result |
|---|---|---|---|
| Weapon calibration | Stationary dummy | Minimal | Clean impact data |
| Accuracy practice | Slow or standing dummy | Open space | Reliable line of sight |
| Knockback study | One dummy | Flat, clear ground | Direction and distance traveled |
| Hazard control | One dummy | Fixed hazard placement | Push, fall, or collision behavior |
| Escape test | Moving dummy | Small test area | Whether pursuit is disrupted |
| Survival challenge | Several threats | Varied hazards | Which attack or position creates breathing room |
A survival test should also distinguish direct damage from positional control. Preventing a target from reaching you can be more valuable than a small amount of extra damage, especially when distance and cover determine whether you keep control of the encounter.
The best way to play with hazards is to begin from a known position. Walk to the same mark, face the same direction, and repeat the test. Once the baseline is reliable, add one feature such as a slope, ledge, or moving target. This prevents a spectacular accident from being mistaken for a consistent technique.
Distance Changes the Outcome
Distance gives you time to read a target and choose whether to attack, reposition, or disengage. It also changes how weapon and target movement combine. A stationary shot can miss because of crosshair placement, while a moving target can miss because you fired before the camera settled.
A practical Ragdoll Reality advanced guide should emphasize position before raw force. A stronger weapon does not create an advantage if the target reaches your blind side. Before engaging, identify where the dummy is moving, whether you have room to swing or aim, and which direction would send it toward a useful edge.
A Repeatable Method for Faster Improvement
Fast improvement comes from turning observations into rules. Keep a short log with the weapon, target area, distance, result, and next question. This creates a personal test history that becomes more useful as the collection grows. It also makes the difference between experimentation and aimless play obvious.
The Five-Step Practice Loop
-
State the objective. Write one result you want, such as interrupting movement with a leg hit or creating enough push to move a dummy toward an edge.
-
Build a baseline. Use a stationary target, a familiar weapon, and a clear area. Record the usual reaction without extra hazards.
-
Change one factor. Adjust only the body area, distance, weapon, target movement, or environment that your question concerns.
-
Repeat the action. Perform several attempts rather than trusting a single unusual result. Physics can produce different angles from seemingly identical inputs.
-
Record and compare. Note what consistently happened, then turn the result into a rule for the next scenario.
| Session length | Best use | Practical target |
|---|---|---|
| 10 minutes | One quick calibration | Confirm control and one target area |
| 20 minutes | Focused comparison | Test two variables under matched conditions |
| 30 minutes | Scenario practice | Apply one weapon and reaction pattern |
| 45+ minutes | Advanced challenge | Combine movement, hazards, and multiple targets |
This five-step loop is a practical answer to how to get better without pretending that one sequence fits every situation. It also helps new players leave a session with knowledge rather than a collection of disconnected highlights. If you want a broader setup for the first hour, the Ragdoll Reality first-hour plan can be paired with this mistake-focused routine.
Keep a Session Note
A compact note prevents repeated errors by linking each failed test to a specific physical variable, such as impact speed, grip angle, limb orientation, or the target’s movement at contact. For example, if the same weapon strikes the same distance but succeeds only while the target runs, record that setup rather than blaming the weapon. This turns an improvised ragdoll observation into a repeatable comparison, helping you identify which change actually produced the different ragdoll reaction.
-
Weapon: Which tool was used?
-
Target: Where did the hit land?
-
Setup: What was the distance and target movement?
-
Result: What happened immediately afterward?
-
Next test: Which single variable should change?
Community experience supports the value of observation because players naturally discover different body and weapon interactions through experimentation. However, community reports should be treated as hypotheses until they are repeated under controlled conditions. Your own consistent results remain the most relevant evidence for your settings and current version.
Preparing for Graveyard and Horde Mode
The Halloween layer introduces more complex targets. According to the official page, a dummy thrown into the graveyard becomes a zombie, and zombies are divided into slow, normal, and fast classes that can chase, pounce, and bite. A Horde button starts a wave-survival mode. Because exact zombie health, bite damage, and wave population are not published on the official page, players should test those values rather than assume fixed numbers.
This creates another place where ragdoll reality beginner mistakes can become expensive. Testing directly in a wave may teach survival, but it can also hide which action actually worked. Prepare with individual targets first, then add one hostile at a time before facing a larger group.
Learn the Three Speed Classes
The speed class changes the timing of every encounter. A slow zombie gives you more room to observe its path, a normal zombie demands regular repositioning, and a fast zombie makes delayed decisions more costly. Although the official page does not publish exact movement values, it clearly distinguishes the three categories.
| Target type | What to test first | Common error | Better preparation |
|---|---|---|---|
| Slow zombie | Chase route and stopping distance | Waiting too long before acting | Practice one interruption at a time |
| Normal zombie | Direction changes and recovery | Chasing from directly behind | Preserve space and angle |
| Fast zombie | Early recognition and first reaction | Using a slow weapon test as a delay | Test a ready response before the wave |
| Infected dummy | Conversion behavior | Assuming every body reacts identically | Record how infection changes movement |
Before entering a wave, verify that your weapon can reach the relevant body area, your camera is aligned, and you have a safe response to a fast target. A weapon that performs well against a stationary dummy may demand different timing against a moving zombie. The Ragdoll Reality strategy guide can help organize that preparation around clear goals.
Keep the First Wave Simple
During the opening wave, prioritize survival and information over maximum damage. Move away from a fast zombie, interrupt the nearest threat, and use the terrain to control where targets approach. Once you can identify the different zombie classes, you can choose which reaction is more valuable: escape, stagger, or convert the encounter into a safer test.
The official page also says that a bitten dummy becomes infected and can convert. That makes body control relevant beyond simply reducing damage. A leg hit that changes movement might delay a target, while an arm hit may alter its ability to act. Treat conversion as another system to observe, not a guaranteed shortcut.
Turning Experience Into Reliable Rules
The most important lesson from early sessions is that Ragdoll Reality rewards controlled curiosity. Pick a question, test it cleanly, and change one variable at a time. This approach prevents the frustration of repeating ineffective actions and helps you build a genuine understanding of weapons, body reactions, movement, and hazards.
A short progression checklist can keep the lessons organized: track each test’s weapon, target area, body reaction, and final fall, then mark the result as torso, limb, or uncontrolled. For example, compare the same rifle against the torso and leg before changing equipment; if the leg produces a sharper reaction, you can isolate the cause without confusing damage, mass, and collision timing. This turns informal trial and error into a repeatable Ragdoll Reality strategy while revealing which beginner mistakes still need correction.
- I can identify whether a hit landed on the torso, arm, or leg.
- I have tested at least one weapon under identical conditions.
- I record the first reaction instead of judging only the final fall.
- I practice one target area before comparing several areas.
- I test the graveyard and Horde mode individually before a full wave.
- I can explain why each test succeeded or failed.
These checks summarize the ragdoll reality beginner mistakes that consume the most time: uncontrolled comparisons, vague targets, ignored timing, premature equipment changes, and insufficient attention to the environment. Address those errors and the sandbox becomes easier to read, even when its physics remains unpredictable.
The result is not simply more activity. It is a stronger Ragdoll Reality advanced guide built around your own repeatable evidence. Once your routine isolates variables, records reactions, and tests conclusions under pressure, every weapon and scenario becomes easier to evaluate.
Frequently Asked Questions
What are the most common beginner mistakes in Ragdoll Reality?
The most common mistakes are changing several variables during one test, ignoring where a hit lands, and judging a weapon only by the final knockdown. A better routine keeps distance and target movement constant, records the immediate body reaction, and changes only the factor you want to examine.
What is the best way to practice the physics sandbox?
Practice with one stationary dummy, one weapon, and one target area before adding movement or hazards. Repeat each test several times, record the first reaction and later recovery, then change a single variable. This approach makes your findings more reliable than repeatedly switching tools.
How can I get better at hitting specific body parts?
Begin with close-range, stationary tests and keep the camera aligned with the intended target. Notice how leg impacts affect walking and how arm impacts affect the dummy’s actions. Increase distance gradually, since movement and camera angle can make a visually aimed hit land elsewhere.
Should I use the same weapon for every scenario?
No. A single weapon can be useful for learning, but each scenario may require a different range, timing, or control pattern. Compare tools under matched conditions, then choose the one that consistently creates the reaction you need rather than choosing solely by apparent impact power.
How should I prepare for Horde mode?
Learn the chase, pounce, and bite behavior of slow, normal, and fast zombies individually before entering a wave. Test how your weapon handles a moving target, keep space against faster threats, and record the effect of each interruption. Since exact wave and damage values are not published, rely on current in-game testing.